Simple way to move your Excel tasks into Planner
During Teamsdagen this year I got the great honor of speaking about the PowerPlatform and Ive already made a blogpost about the give away of my session, the FileAnalytics report i Power BI and it’s not time for a blog post about the Flow in Power Automate that I also demoed.
Many project managers out there use Excel for their planning and I think we all have had to work with task lists from Excel sheets. Don’t get me wrong, I love Excel as much as the next guy (I didn’t get my Excel Expert certification in a cereal box) but even I have to admit there are better tools for the job. Planner is one of those tools and so the idea here is simple. We’ll use a Flow in Power Automate to read the lines of our existing Excel file with tasks and then create them as tasks in Planner. A simple little migration you can do yourself!
Step 1 – Prep the Excel file
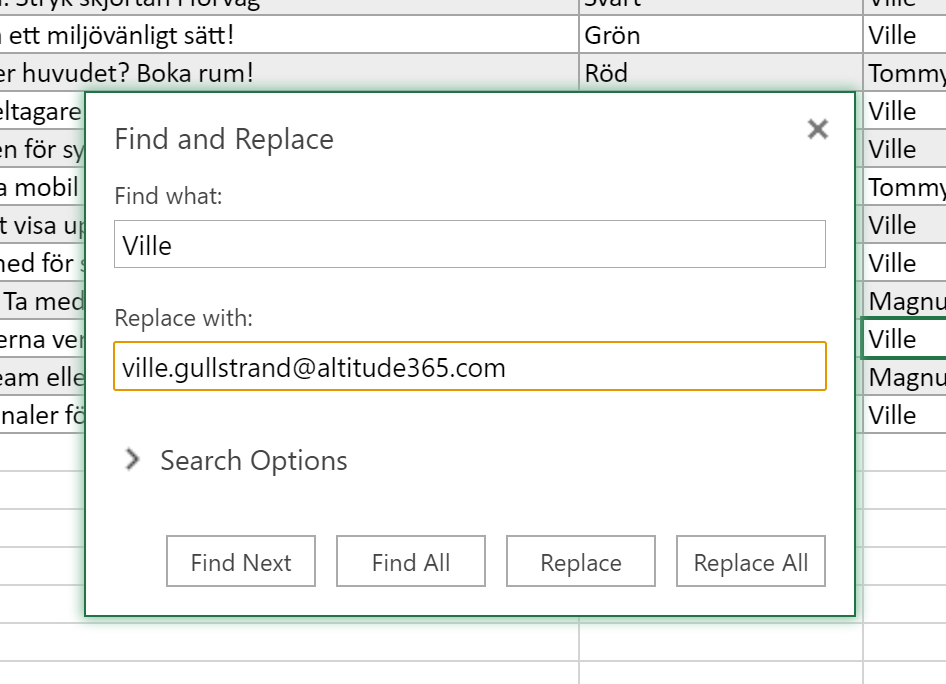
I’ve opened my Excel file that has a couple of tasks in it. Most projects I’ve been in doesn’t have hundreds of project members and so most of the task lists simply says the name of the person who’s responsible for carrying out the tasks. All fine for a human to read, not so great when you want to send it to Planner as the assignee. Instead we need email addresses here! Simply use the shortcut CTRL + H for Search and Replace. Replace the names with their email addresses.

There we go! We have som unwanted columns, but for now we’ll simply let them be. This is our new Excel table right here!
The green areas are the columns we’ll be using later in the Flow.

Step 2 – Set up the Flow
Head into Power Automate and create a new flow that is triggered by a Flow button.
Next, get the table from you Excel file. Make sure you’ve made a table in the Excel file or it won’t show here.

The next step in your Flow is a for each loop. This will be created automaticyl if you just create the step “Create a Task” which just happens to be the first step inside the Apply to each! Select you planner-plan that you want you tasks to be created in and set the task name as a dynamic value in the Title-field. Assign it to the column containing your email addresses and set up a step to update a task right after creating it.

The reason we want to update the task right after creating it is because we can’t add a description to a task that doesn’t exist. First we need to create it, then we can add the description inside that task. By setting this step right after creating the task, we can use the ID of the task as a dynamic value from the very step above! Essentially you’ll create a task, fetch that task, add the description and the do it all over again until all the lines in the Excel fil have become tasks in your planner.
Step 3 – Wrap up!
Add a Post a message to Teams as your final step to inform your collegues of the new tasks available!
Of course they’ll get notifications if any tasks was assigned to them as well, but I kind of like this final touch either way.
